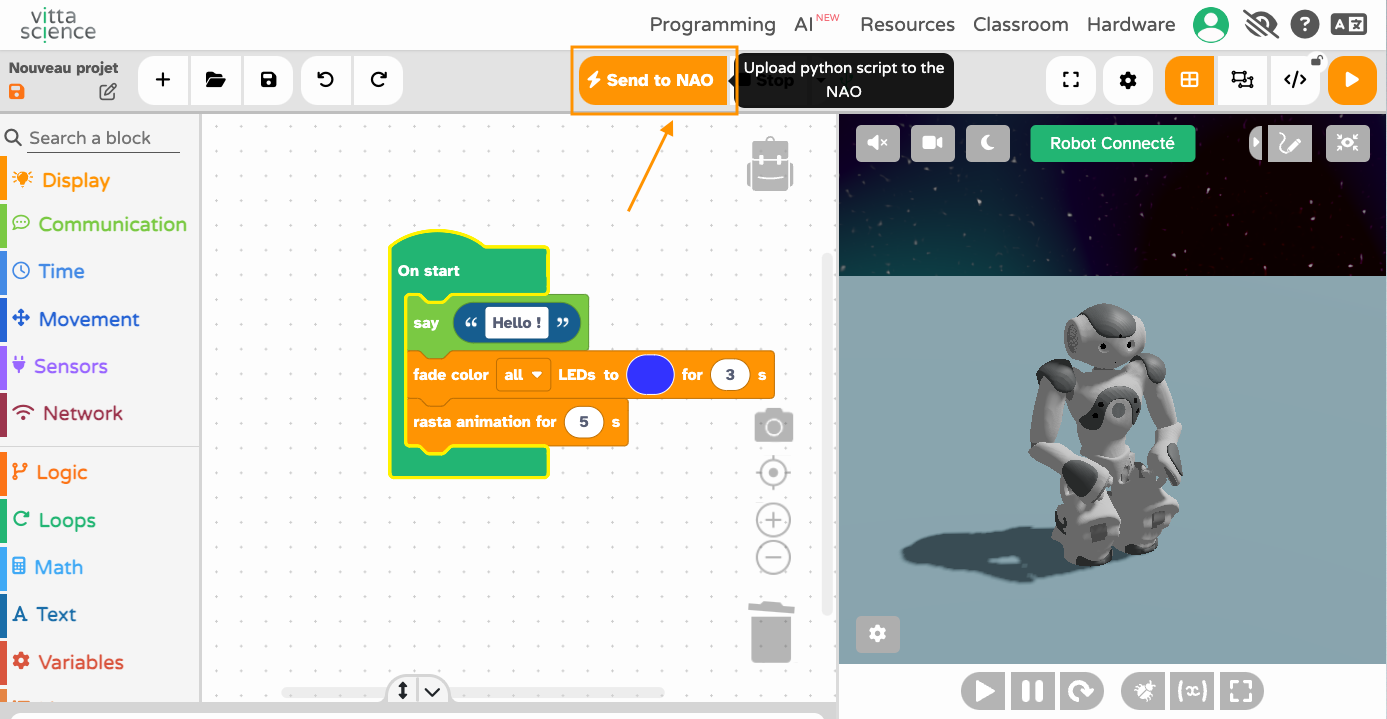
To connect the NAO robot to the Vittascience interface, you need to use a Companion Application, which acts as a bridge between the web interface and the robot.
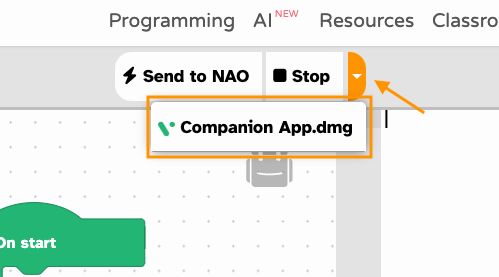
Ensure that the NAO robot and your computer are connected to the same local network (Wi-Fi or Ethernet). For further details, please refer to this documentation.To download the application:- Click on the dropdown menu in the Vittascience interface.
- Select the link corresponding to your operating system:
- .dmg for macOS
- .exe for Windows
- .deb for Linux
Note: The application and source code is also available
here.
 Once the application is downloaded:
- Open the application.
- Select the card corresponding to the NAO robot.
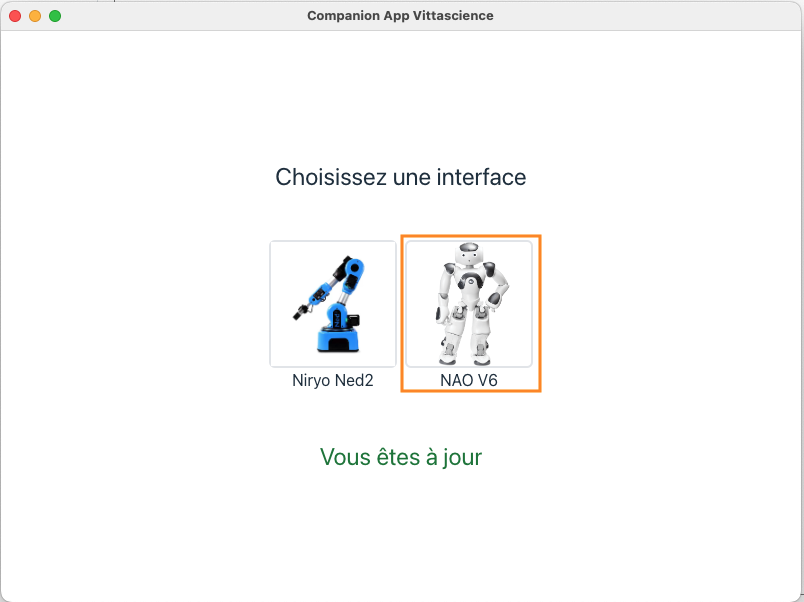
The application must remain open while using the Vittascience interface. However, you can minimize its window.
When the NAO robot card is selected:- Return to the Vittascience interface.
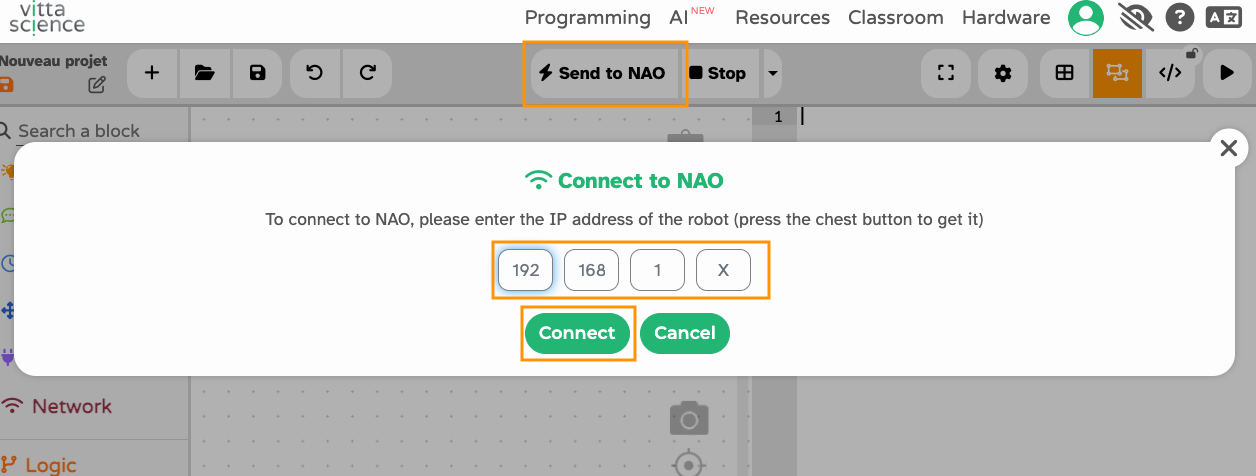
- Click the "Send to NAO" button.
- A pop-up will appear, asking you to enter your robot's IP address (you can obtain this by pressing the button on NAO's chest).
- Click "Connect".
Note: The password and username of NAO should be the default ones ("nao" and "nao").
If everything is configured correctly, the pop-up will close automatically, confirming the connection is successful.
⚠️
WarningWhen you connect the robot to Vittascience,
NAO automatically exits solitary mode. During the connection process,
NAO enters standby mode, and its motors are released at the end. This means that after execution, the robot will not hold its position.
If you want NAO to return to solitary mode afterwards, you can press the chest button twice.